Being able to visually attract people to your blog content is important. I use a lot of collages and images with text on my posts to make them stand out and make my content easily sharable on Pinterest. As a designer I use Adobe Photoshop and Illustrator to create my visual content, but what if you are not a designer or don’t have access to those programs? Don’t worry there are a lot of good options out there for you to start getting creative. I am going to show you how to use Canva to take your blog graphics to the next level.
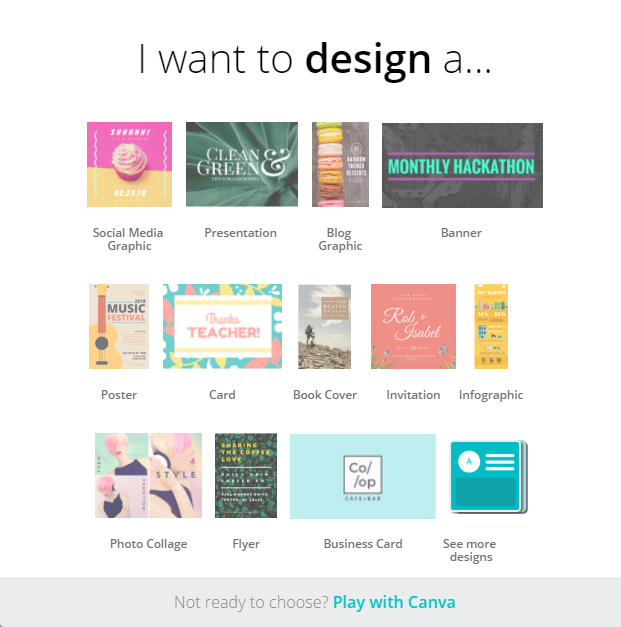
Canva is a great website that allows you to choose from a large variety of pre-designed templates that you can customize with your own photos and text. There are templates for Facebook cover images, social media, posters, presentations, letterheads, infographics, and business cards. You get the idea – lots of stuff you can make and it is free! Let’s get started.
 1. Sign up for a free Canva account.
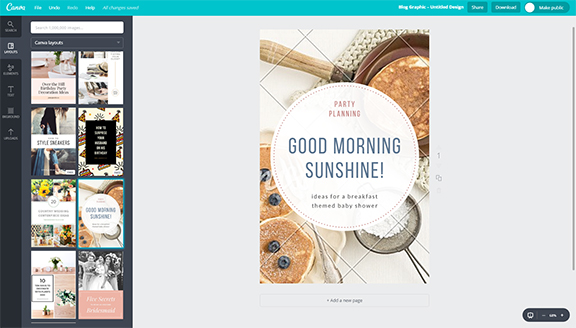
2. Look through the templates in the Layout to see what will best suit the kind of image you need (instagram image, blog graphic, business card etc), then look through the templates within that category and select a template you wish to customise. I chose the Blog Graphic template for this example.
TIP: When looking at templates, ignore the colors, images used and even font style, as all of this can be changed. Just look at layout, how many images the template allows, and any graphic elements such as borders, dividing lines and icons.
3. Having chosen a template in the Layout section, I wanted to use a different image in the background. The simplest way to do this is to click on the image in the design preview section on the right and a little editing box will appear. You can then simply click on the trash can icon to delete the image – or just select the image and hit backspace.
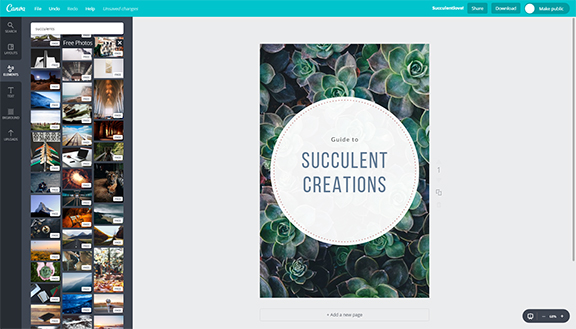
4. Next, I used a free image from the elements tab on the left side of the screen. You can also pick a simple textured background by selecting the background tab or upload your own photo to use (72 dpi works best for images you are displaying on the web).
TIP: Photographers can contribute to the stock library and you can use their images- some photos and design elements are a dollar each if you use them in your design. Still a pretty good deal.
5. If you are happy with the text elements of the template you have chosen, you can edit the text by just clicking on the text in the design preview section that you want to change and type in your new text. OR if you would like to add a more detailed text design element, click the Text tab on the left and choose a design. Again, there is a little editing box where you can change the font, size, color, line spacing, and line height.
6. Once you have your text edited, you can click and drag it into the position that works best with your background image, along with any other design elements.
TIP: If you ever get stuck and need help, click the green Need Help? tab at the bottom and the Canva experts will be happy to help you.
8. When you are all done with your design, click the Download button at the top of the window and your design will be downloaded to your computer. It is now perfect for using on your blog!
Canva is a great tool if you’re not a graphic designer, but I would recommend professional graphic designers also check it out. It can be used for inspiration or as a time-saving device.
Have you used Canva before? What do you use to create your blog graphics?
{images from here}


Aubri Haggard
February 20, 2017 at 4:30 pm //
This was such an insightful and helpful post! I will definitely be using this tool in the future to create more visually appealing blog posts. Thank you!